Allow instance admins to add custom CSS that will affect
every page of their instance.

This is done with a new CustomCSS instance setting that
works pretty much exactly like the Users CustomCSS property.
This custom CSS is then requested for every page load.
User styles/themes take precedence over this CSS.
9.7 KiB
Admin Settings Panel
The GoToSocial admin settings panel uses the admin API to manage your instance. It's combined with the user settings panel and uses the same OAuth mechanism as normal clients (with scope: admin).
Setting admin account permissions and logging in
To use the admin settings panel, your account has to be promoted to admin:
./gotosocial --config-path ./config.yaml admin account promote --username YOUR_USERNAME
In order for the promotion to 'take', you may need to restart your instance after running the command.
After this, you can navigate to https://[your-instance-name.org]/settings, enter your domain in the login field, and login like you would with any other client. You should now see the admin settings.
Moderation
Instance moderation settings.
Reports
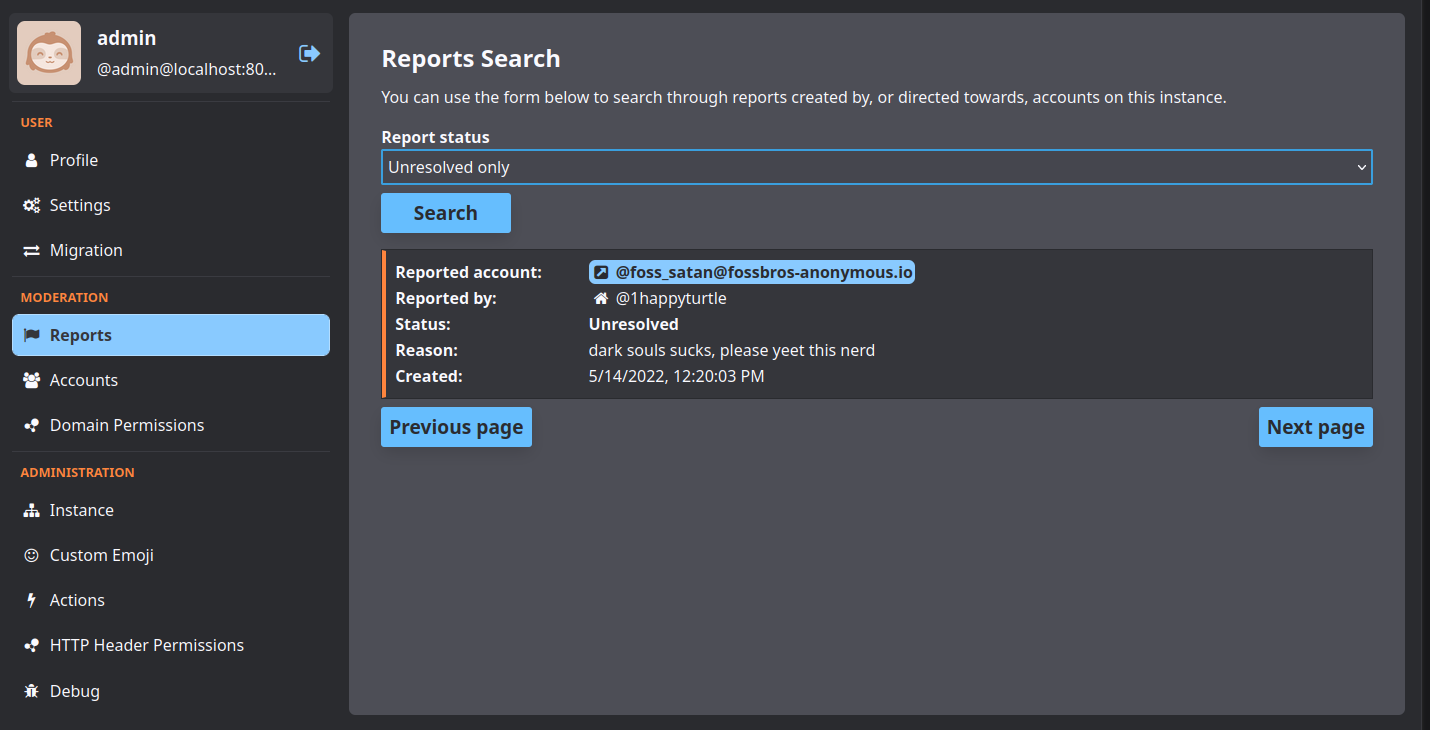
The reports section shows a list of reports, originating from your local users, or remote instances (shown anonymously as just the name of the instance, without specific username).
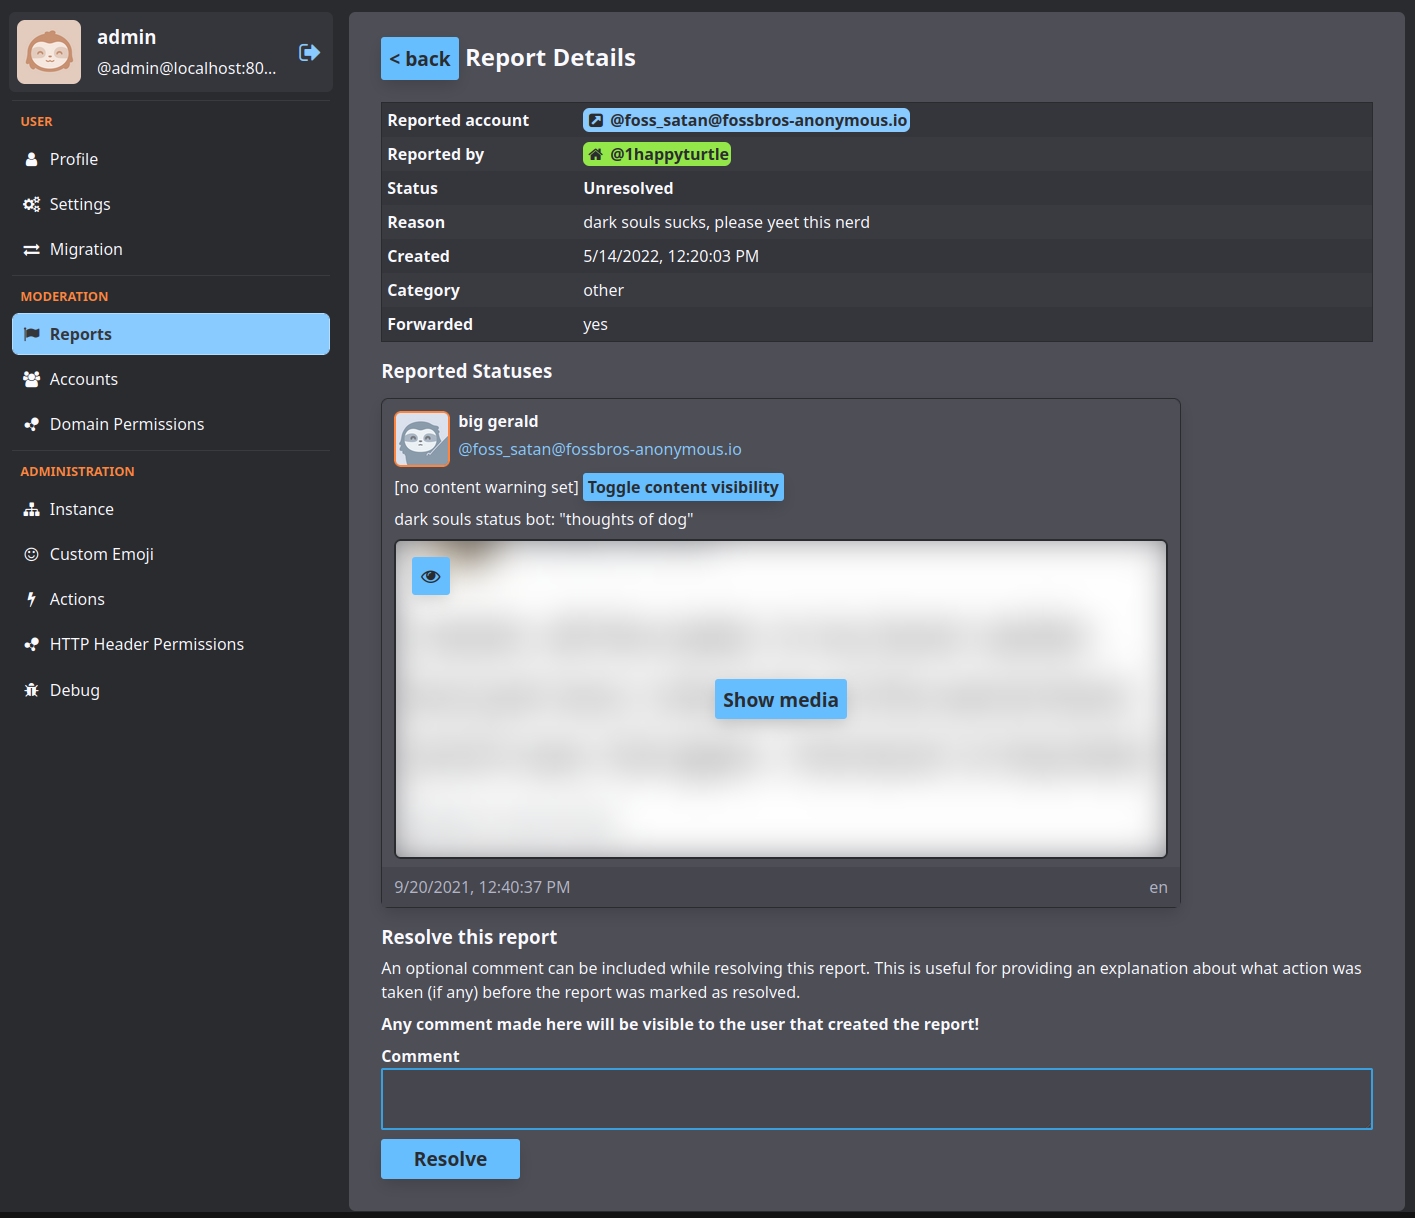
Clicking a report shows if it was resolved (with the reasoning if available), more information, and a list of reported toots if selected by the reporting user. You can also use this view to mark a report as resolved, and fill in a comment. Whatever comment you enter here will be visible to the user that created the report, if that user is from your instance.
Clicking on the username of the reported account opens that account in the 'Accounts' view, allowing you to perform moderation actions on it.
Accounts
You can use this section to search for an account and perform moderation actions on it.
Federation
In the federation section you can create, delete, and review explicit domain blocks and domain allows.
For more detail on federation settings, and specifically how domain allows and domain blocks work in combination, please see the federation modes section, and the domain blocks section.
Domain Blocks
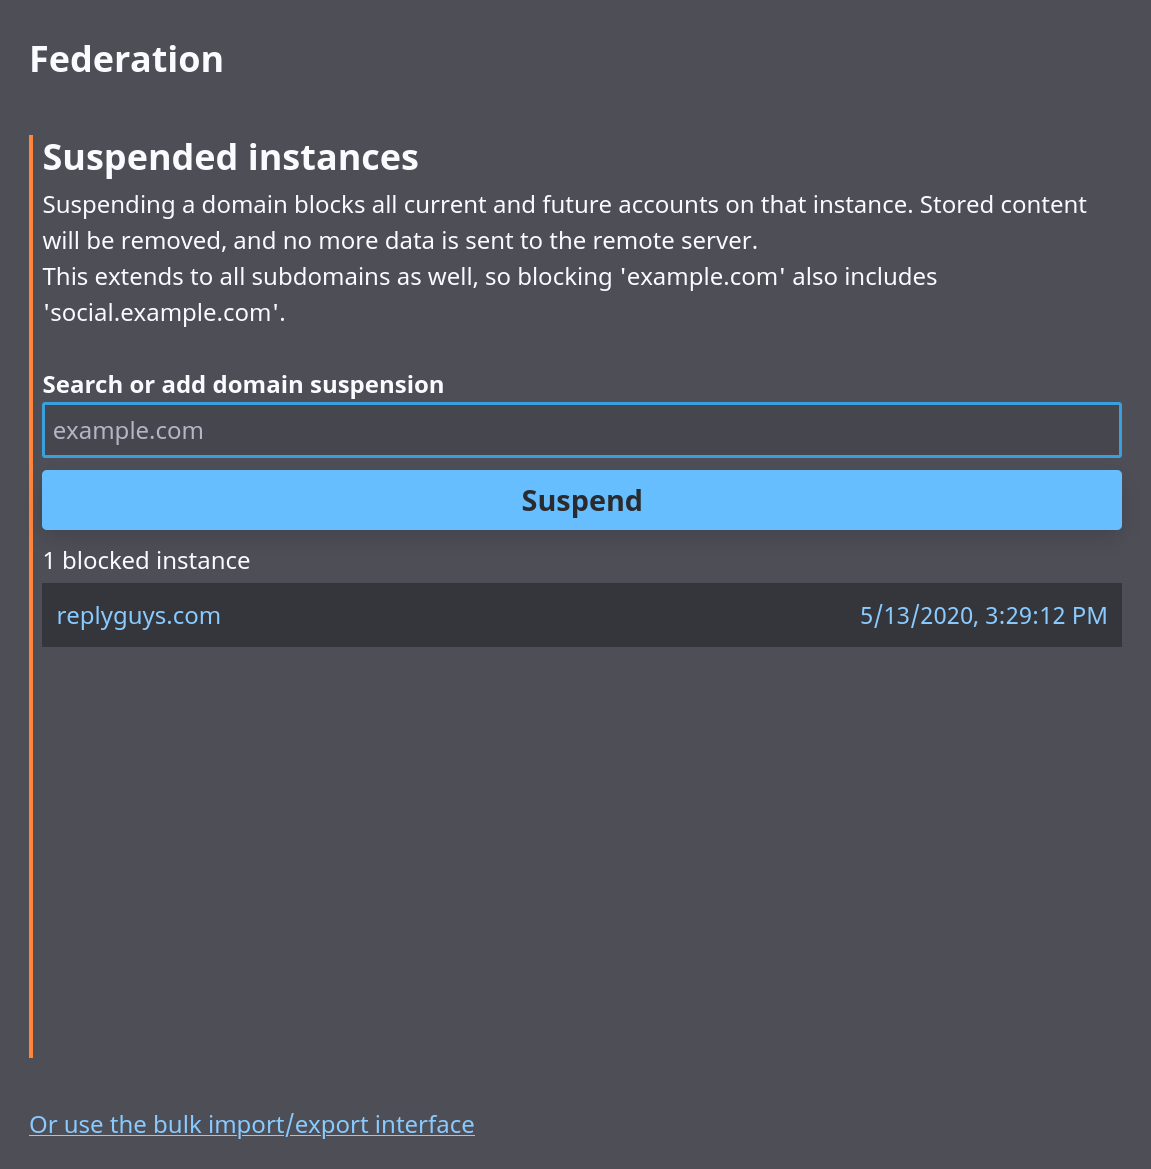
You can enter a domain to suspend in the search field, which will filter the list to show you if you already have a block for it.
Clicking 'suspend' gives you a form to add a public and/or private comment, and submit to add the block. Adding a suspension will suspend all the currently known accounts on the instance, and prevent any new interactions with any user on the blocked instance.
Domain Allows
The domain allows section works much like the domain blocks section, described above, only for explicit domain allows rather than domain blocks.
Bulk import/export
Through the link at the bottom of the Federation section (or going to /settings/admin/federation/import-export) you can do bulk import/export of blocklists and allowlists.
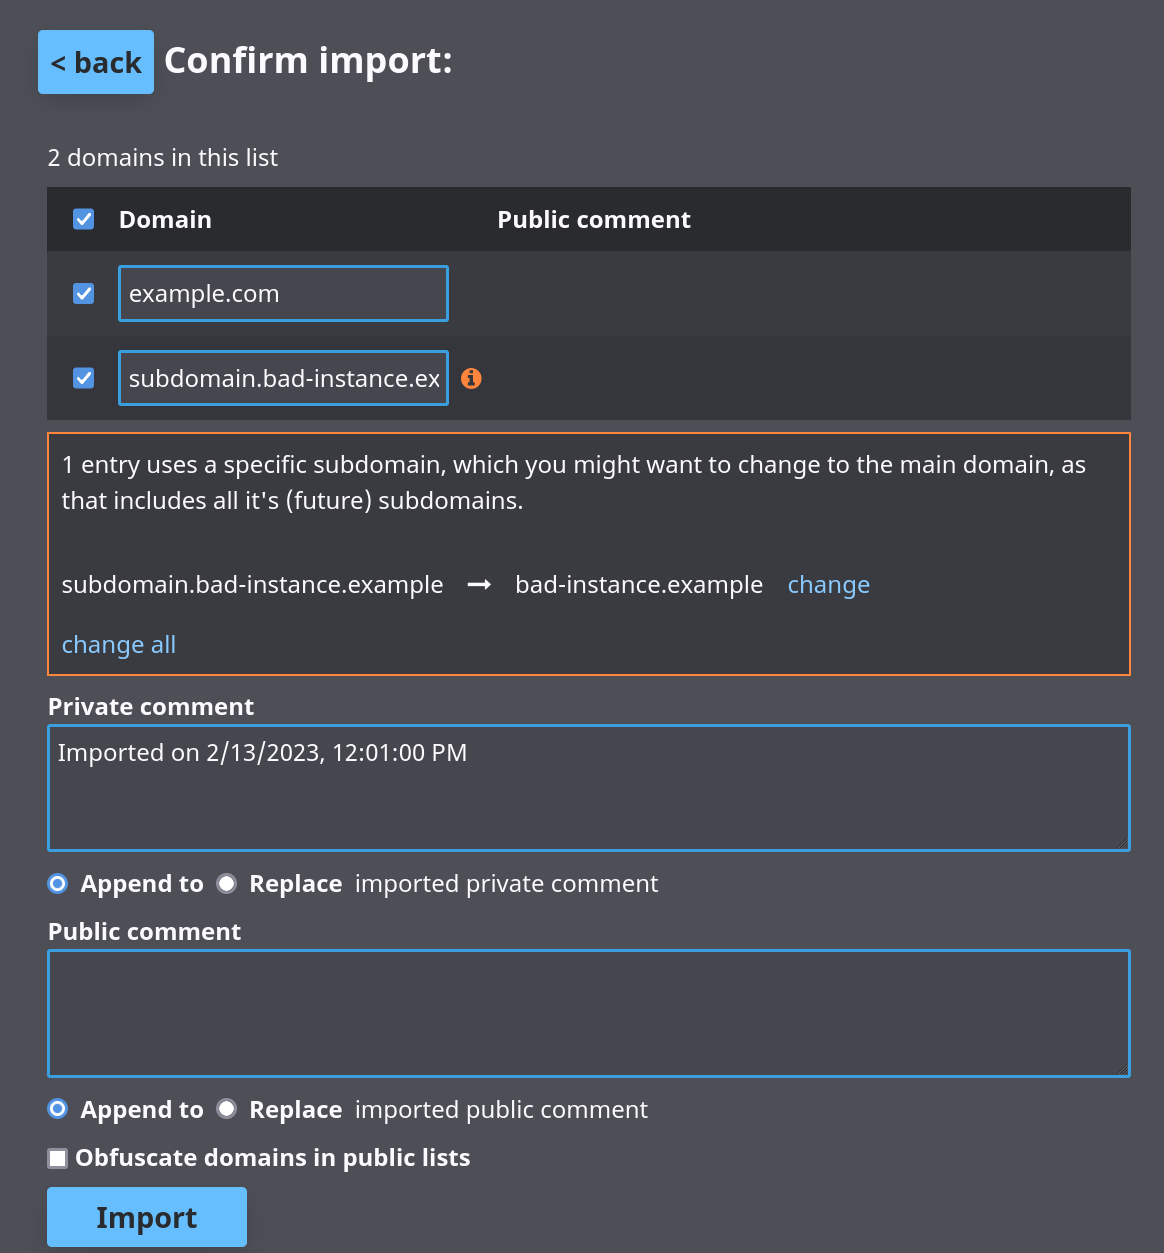
Upon importing a list, either through the input field or from a file, you can review the entries in the list before importing a subset. You'll also be warned for entries that use subdomains, providing an easy way to change them to the main domain.
Administration
Instance administration settings.
Actions
Run one-off administrative actions.
You can use this section to send a test email to the given email address, with an optional test message.
Media
You can use this section run a media action to clean up the remote media cache using the specified number of days. Media older than the given number of days will be removed from storage (s3 or local). Media removed in this way will be refetched again later if the media is required again. This action is functionally identical to the media cleanup that runs automatically.
Keys
You can use this section to expire/invalidate public keys from the selected remote instance. The next time your instance receives a signed request using an expired key, it will attempt to fetch and store the public key again.
Custom Emoji
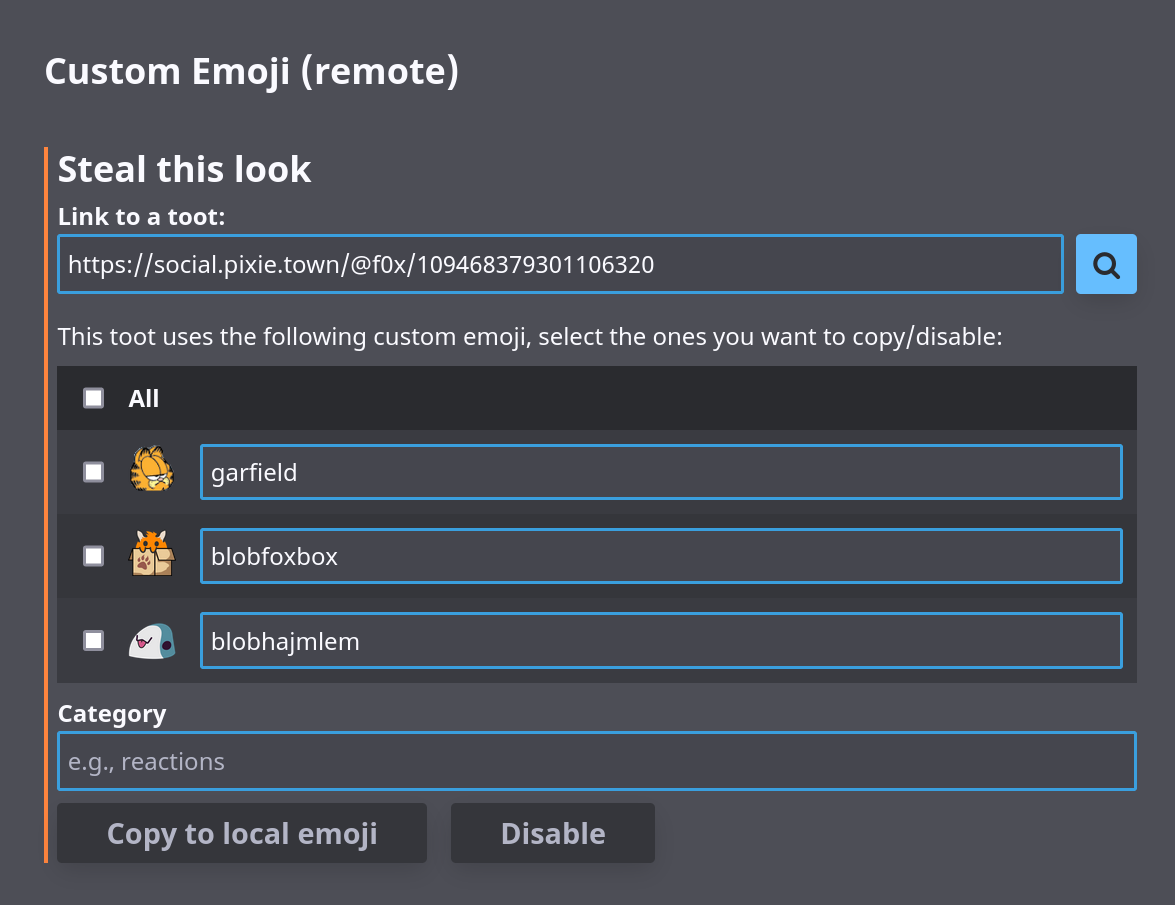
Custom Emoji will be automatically fetched when included in remote toots, but to use them in your own posts they have to be enabled on your instance.
Local
This section shows an overview of all the custom emoji enabled on your instance, sorted by their category. Clicking an emoji shows it's details, and provides options to change the category or image, or delete it completely. The shortcode cannot be updated here, you would have to upload it with the new shortcode yourself (and optionally delete the old one).
Below the overview you can upload your own custom emoji, after previewing how they look in a toot. PNG and (animated) GIF's are supported.
Remote
Through the 'remote' section, you can look up a link to any remote toots (provided the instance isn't suspended). If they use any custom emoji they will be listed, providing an easy way to copy them to the local emoji (for use in your own toots), or disable them ( hiding them from toots).
Note: as the testrig server does not federate, this feature can't be used in development (500: Internal Server Error).
Instance Settings
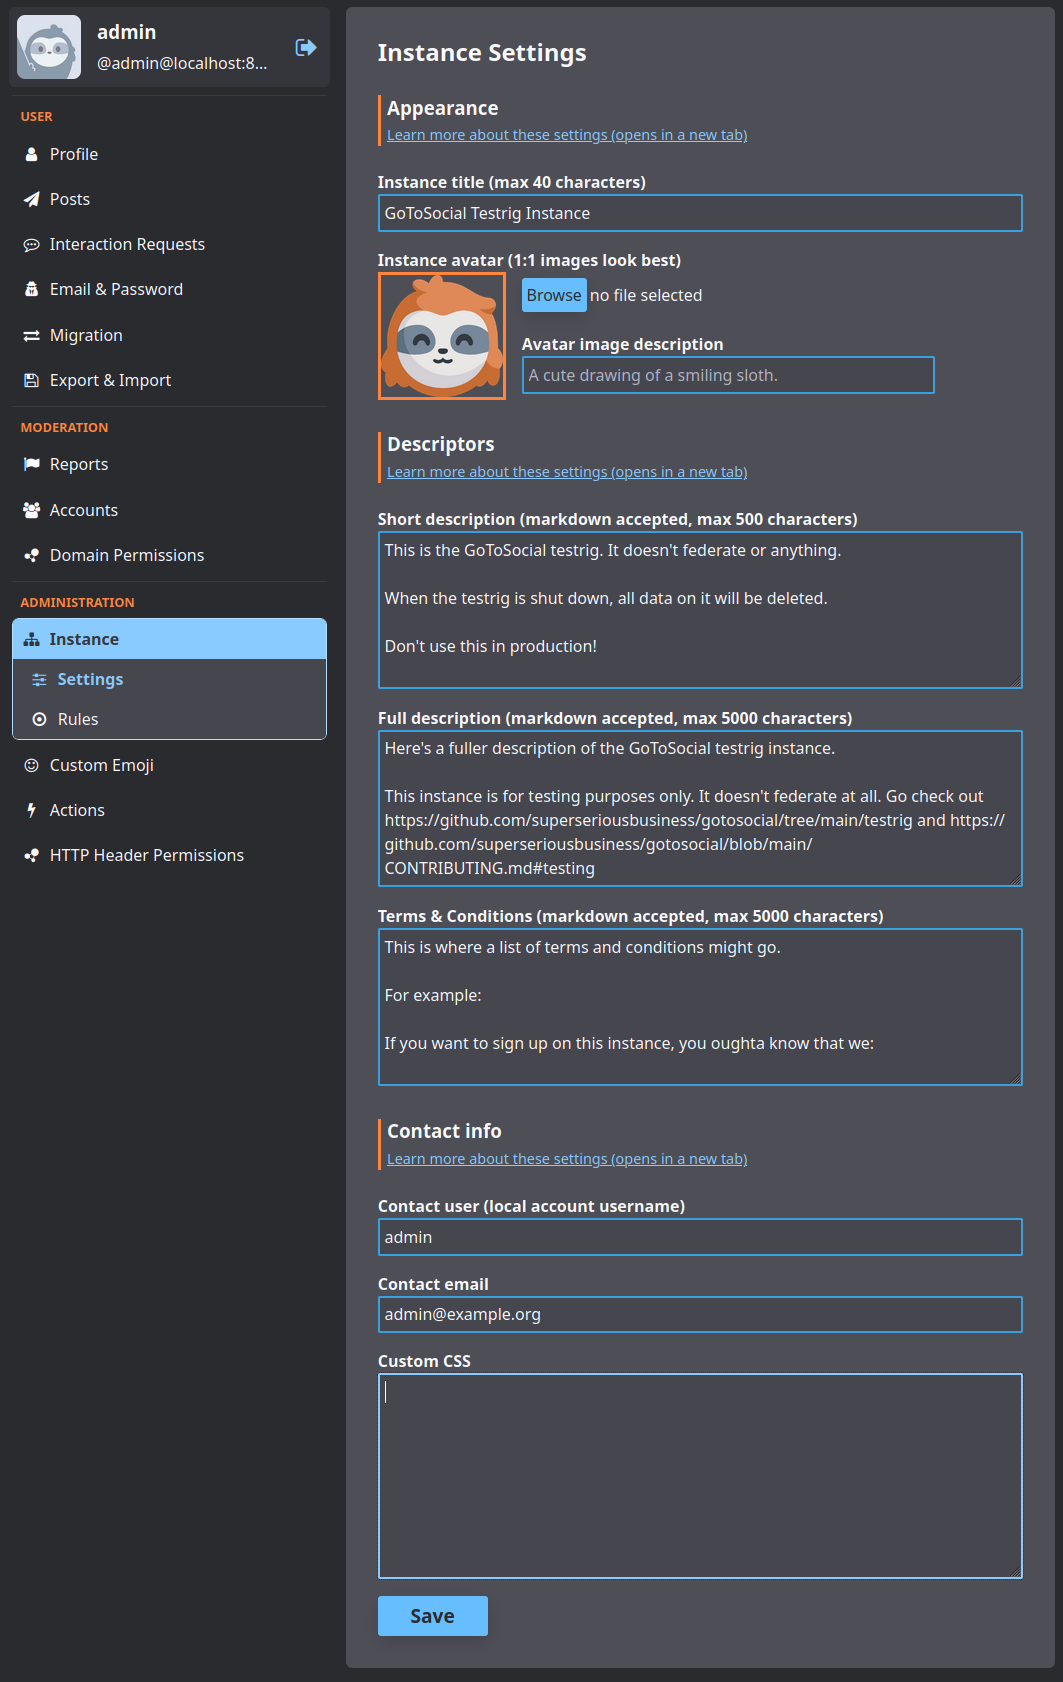
Here you can set various metadata for your instance, like the displayed name/title, thumbnail image, (short) description, and contact info.
Instance Appearance
These settings primary affect how your instance appears to others and on the web.
Your instance title will appear at the top of every web page on your instance, and in OpenGraph meta tags, so pick something that represents the vibe of your instance.
The instance avatar is sort of like the mascot of your instance. It will appear next to the instance title at the top of every page, and as the preview image in browser tabs, OpenGraph links, and that sort of thing.
If you set an instance avatar, we highly recommend setting the avatar image description as well. This will provide alt text for the image you set as avatar, helping screenreader users to understand what's depicted in the image. Keep it short and sweet.
Instance Descriptors
You can use these fields to set short and full descriptions of your instance, as well as to provide terms and conditions for current and prospective users of your instance.
The short description will be shown on the instance home page, right near the top, and in response to /api/v1/instance queries.
It's a good idea to provide something pithy in here, to give visitors to your instance an immediate impression of what you're all about. For example:
This is an instance for enthusiasts of classic synthesizers.
Sick beats are for life, and not just for Christmas!
or:
This is a single-user instance just for me!
Here's my profile: @your_username
The full description will appear on your instance's /about page, and in response to /api/v1/instance queries.
You can use this to provide info like:
- your instance's history, ethos, attitude, and vibe
- the kinds of things your instance denizens tend to post about
- how to get an account on your instance (if it's possible at all)
- a list of users with accounts on the instance, who want to be found more easily
The terms and conditions box also appears on your instance's /about page, and in response to /api/v1/instance queries.
Use it for filling in stuff like:
- legal jargon (imprint, GDPR, or links thereto)
- federation policy
- data policy
- account deletion/suspension policy
All of the above fields accept markdown input, so you can write proper lists, codeblocks, horizontal rules, block quotes, or whatever you like.
You can also mention accounts using the standard @user[@domain] format.
Have a look at the markdown cheat sheet to see what else you can do.
Instance Contact Info
In this section, you can provide visitors to your instance with a convenient way of reaching your instance admin.
Links to the set contact account and/or email address will appear on the footer of every web page of your instance, on the /about page in the "contact" section, and in response to /api/v1/instance queries.
The selected contact user must be an active (not suspended) admin and/or moderator on the instance.
If you're on a single-user instance and you give admin privileges to your main account, you can just fill in your own username here; you don't need to make a separate admin account just for this.
Instance Custom CSS
custom CSS allows you to further customize the way your instance looks when visited through a browser.
This custom CSS will be applied to all pages of your instance. Users themes and CSS still take precedence over this customization.
See the Custom CSS page for some tips on writing custom CSS for your instance.
